最近在做一个植物物种的基因家族分析,花了一周时间把能做的图都做了一遍,有空就把所有分析流程都记录一下。
先说一个蛋白性质和序列分析中碰到的问题,我这里也收录了不少蛋白类的在线分析工具和数据库,可以点击这里查看 (shelven.com) ,这些工具我每年会做一次更新。有的在线分析网站只能输入一条序列 分析,当你手上很多序列的时候,一条条数据复制粘贴,点击提交,然后下一个页面再复制粘贴你要的数据,属实麻烦= =
这里就简单记录下我最近用的几个蛋白分析在线网站,以及如何做的大批量自动提交数据以及整理结果。
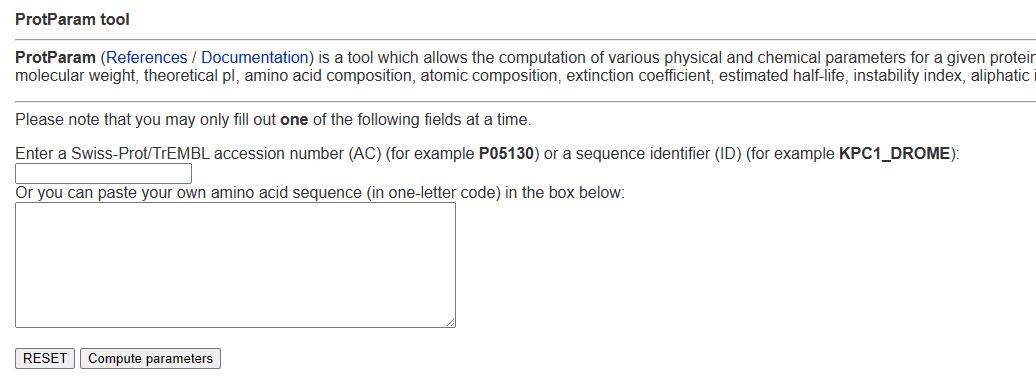
1. ExPASY 这个网站主要是做蛋白性质预测的,可以提供氨基酸序列长度、蛋白分子量、等电点、不稳定指数、脂溶指数和亲水指数等等的信息。
可以通过如下链接访问官网:Expasy - ProtParam tool
这个网站唯一的缺点是一次只能输入一条序列,所以我简单写了个selenium脚本来实现自动化输入序列,以及收集想要的预测信息:
1 2 3 4 5 6 7 8 9 10 11 12 13 14 15 16 17 18 19 20 21 22 23 24 25 26 27 28 29 30 31 32 33 34 35 36 37 38 39 40 41 42 43 44 45 46 47 48 49 50 51 52 53 54 55 56 57 58 59 60 61 62 63 64 65 from selenium import webdriverfrom selenium.webdriver.common.by import Byfrom selenium.webdriver.support import expected_conditions as ECfrom selenium.webdriver.support.wait import WebDriverWaitfrom selenium.webdriver.chrome.service import Servicefrom selenium.webdriver import ChromeOptionsfrom lxml import etreeimport requestsfrom tqdm import tqdm def protein_sequence (file_path ): sequences = {} with open (file_path, 'r' ) as file: content = file.read() blocks = content.split('>' ) for block in blocks[1 :]: index = block.find('\n' ) header = block[:index] sequence = block[index + 1 : -1 ] sequences[header] = sequence return sequences def selenium_search (args ): option = ChromeOptions() option.add_experimental_option('excludeSwitches' , ['enable-automation' ]) bro = Service(executable_path = './chromedriver.exe' ) bro = webdriver.Chrome(service = bro, options = option) bro.get('https://web.expasy.org/protparam/' ) search_input = bro.find_element(By.NAME, 'sequence' ) for key,value in tqdm(args.items()): search_input.clear() search_input.send_keys(value) btn = bro.find_element(By.XPATH, '//*[@type="submit"]' ) btn.click() wait = WebDriverWait(bro, 2 ) page_text = bro.page_source tree = etree.HTML(page_text) Number_of_AA = "" .join(tree.xpath('//*[@id="sib_body"]/pre[2]/b[1]/following-sibling::text()[1]' )).strip() Molecular_weight = "" .join(tree.xpath('//*[@id="sib_body"]/pre[2]/b[2]/following-sibling::text()[1]' )).strip() Theoretical_pI = "" .join(tree.xpath('//*[@id="sib_body"]/pre[2]/b[3]/following-sibling::text()[1]' )).strip() Instability_index = tree.xpath("//*[contains(text(),'Instability index:')]/following-sibling::text()[1]" ) Instability_index = "" .join(Instability_index).strip().split(' ' )[8 ].split('\n' )[0 ] Aliphatic_index = "" .join(tree.xpath("//*[contains(text(),'Aliphatic index:')]/following-sibling::text()[1]" )).strip() gravy = "" .join(tree.xpath("//*[contains(text(),'Grand average of hydropathicity (GRAVY):')]/following-sibling::text()[1]" )).strip() with open ('ExPASY.tab' , 'a' , encoding = 'utf-8' ) as file: file.write(f'{key} \t{Number_of_AA} \t{Molecular_weight} \t{Theoretical_pI} \t{Instability_index} \t{Aliphatic_index} \t{gravy} \n' ) bro.back() bro.quit() protein_file = "path/to/your/protein/file" protein_dictionary = protein_sequence(protein_file) selenium_search(protein_dictionary)
运行的时候会自动调用chrome,这个时候就可以喝杯茶休息一下等结果了~
结果文件ExPASY.tab中一共有tab键分隔的7列,分别是蛋白名、氨基酸序列长度、蛋白分子量、等电点、不稳定指数、脂溶指数和亲水指数(GRAVY) 。我这里51个序列只用了2分钟不到:
这个网页我的印象很深,因为结果网页中所有我要的数据是没有标签包裹的 ,所以只能用following-sibling::text()这种方式来定位两个标签之间的文本。而且很奇怪,xpath定位后三个数据的路径无法用前三个数据的定位方法,也就是b[11]、b[12]和b[13]这几个标签无法用路径定位,但是selenum自带的find_element(By.XPATH)却可以,可能因为网页是动态加载的?
如果怕访问太快ip被ban,可以适当sleep几秒
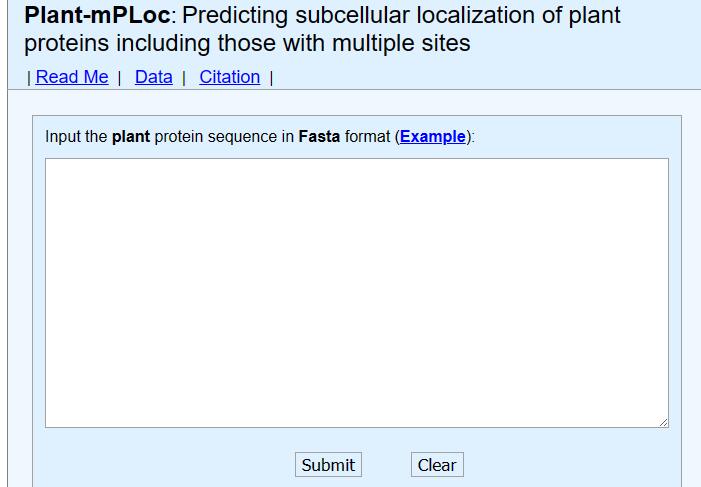
2. Plant-mPLoc 这个网站是预测蛋白亚细胞定位的,和上面一样一次只能提交一条序列。
可以通过以下链接访问官网:Plant-mPLoc server (sjtu.edu.cn)
这个网站的结果页面很简单,且很容易定位到我们想要的标签,只需要把上面的代码稍微改一改即可:
1 2 3 4 5 6 7 8 9 10 11 12 13 14 15 16 17 18 19 20 21 22 23 24 25 26 27 28 29 30 31 32 33 34 35 36 37 38 39 40 41 42 43 44 45 46 47 48 49 50 51 52 53 54 from selenium import webdriverfrom selenium.webdriver.common.by import Byfrom selenium.webdriver.support.wait import WebDriverWaitfrom selenium.webdriver.chrome.service import Servicefrom selenium.webdriver import ChromeOptionsfrom lxml import etreefrom tqdm import tqdmdef protein_sequence (file_path ): sequences = {} with open (file_path, 'r' ) as file: content = file.read() blocks = content.split('>' ) for block in blocks[1 :]: index = block.find('\n' ) header = block[:index] sequence = block[index + 1 : -1 ] sequences[header] = sequence return sequences def search_selenium (args ): option = ChromeOptions() option.add_experimental_option('excludeSwitches' , ['enable-automation' ]) bro = Service(executable_path = './chromedriver.exe' ) bro = webdriver.Chrome(service = bro, options = option) bro.get('http://www.csbio.sjtu.edu.cn/bioinf/plant-multi/#' ) search_input = bro.find_element(By.NAME, 'S1' ) for key,value in tqdm(args.items()): search_input.clear() search_input.send_keys(f">{key} \n{value} " ) btn = bro.find_element(By.XPATH, '//*[@type="submit"]' ) btn.click() wait = WebDriverWait(bro, 2 ) page_text = bro.page_source tree = etree.HTML(page_text) location = tree.xpath('/html/body/div/table/tbody/tr[8]/td/table/tbody/tr[2]/td[2]/strong/font/text()' ) location = location[0 ].strip().replace('.' , '' ) with open ('Plant-mPLoc.tab' , 'a' ) as file: file.write(f'{key} \t{location} \n' ) bro.back() bro.quit() protein_file = "path/to/your/protein/file" protein_dictionary = protein_sequence(protein_file) search_selenium(protein_dictionary)
结果文件就两列,一列是蛋白名,一列是预测的亚细胞定位区域。
如果有http connection报错,把电脑的代理关了即可(上面也一样)。
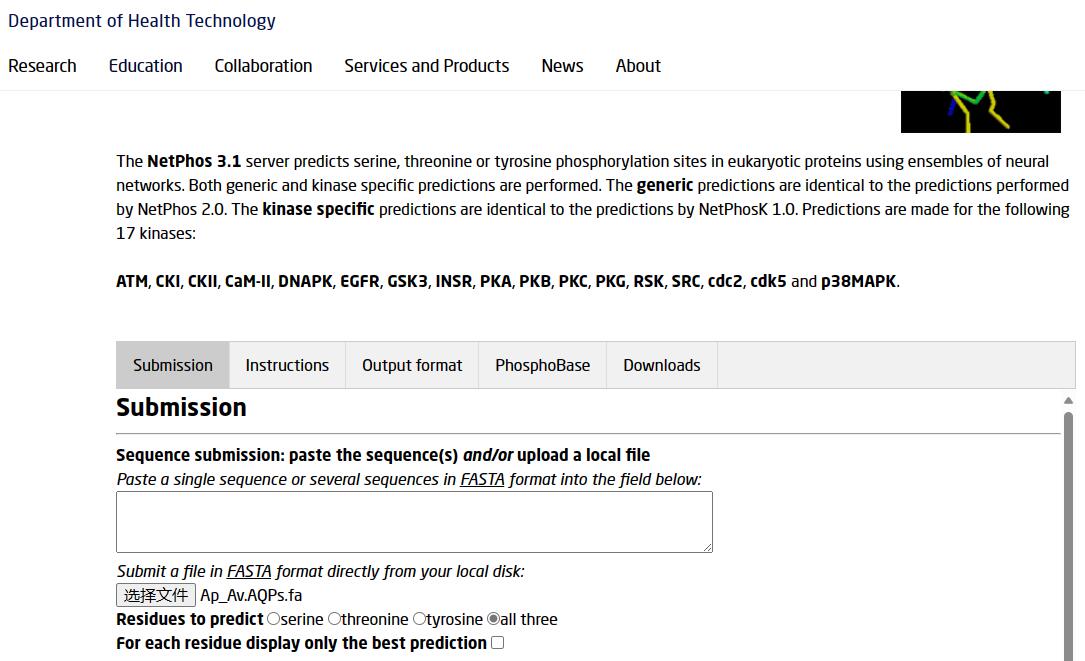
3. NetPhos 3.1 这个网站时预测蛋白磷酸化位点的,和上面两个不同,这个网站支持多条序列输入,也就是可以直接准备fasta格式的文件上传。
可以通过以下网址访问:NetPhos 3.1 - DTU Health Tech - Bioinformatic Services
虽然支持多条序列输入,但是人家结果是一股脑儿全堆在结果网页中的,你没法打包下载…….
对于预测的磷酸化位点的图片,我们可以通过下面方式批量下载:
1 2 3 4 5 6 7 8 9 10 11 12 13 14 15 16 17 18 19 20 21 22 23 24 25 26 27 28 29 30 import requestsdef protein_sequence (file_path ): sequences = {} with open (file_path, 'r' ) as file: content = file.read() blocks = content.split('>' ) for block in blocks[1 :]: index = block.find('\n' ) header = block[:index] sequence = block[index + 1 : -1 ] sequences[header] = sequence return sequences protein_file = "your/path/to/your/protein/file" protein_dictionary = protein_sequence(protein_file) for key in protein_dictionary: url = f"https://services.healthtech.dtu.dk/services/NetPhos-3.1/tmp/your_number/netphos-3.1b.{key} .gif" file_name = f'{key} .gif' response = requests.get(url) if response.status_code == 200 : with open (file_name, "wb" ) as file: file.write(response.content) print (f'图片{file_name} 保存成功!' ) else : print (f'无法下载图片:\n{url} ' )
懒得再写一个函数了,反正就是改两个地方 ,一个是蛋白文件路径,一个是图片的url地址。
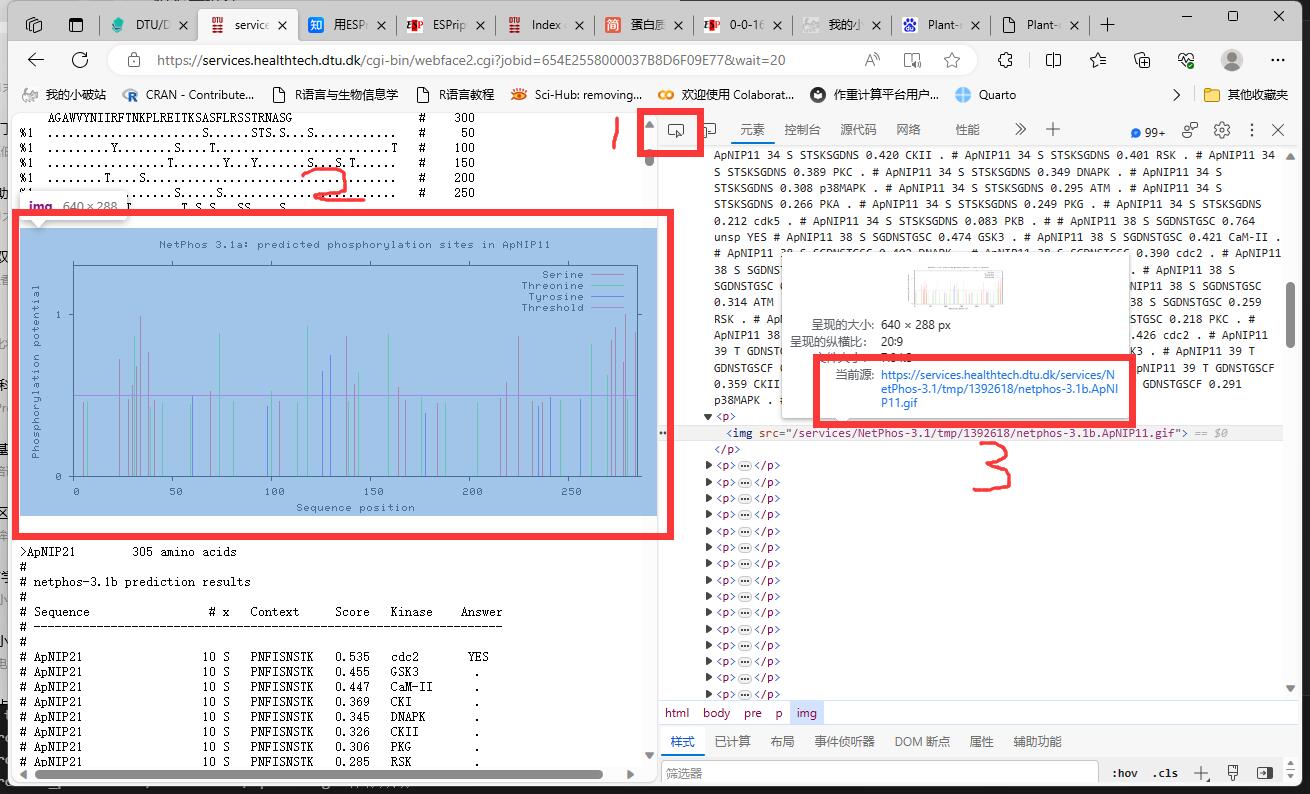
图片url地址怎么找呢?我们在结果网页中,按F12调出控制台,点击下面的红框1审查元素,再点击结果网页中的任何一张图片,右边就会定位到这张图片的img标签位置,查看源地址,我们是可以发现规律的:
https://services.healthtech.dtu.dk/services/NetPhos-3.1/tmp/你的临时文件数字/netphos-3.1b.{key}.gif
这里的key值就是上面protein_sequence函数提取的蛋白名,不用改。
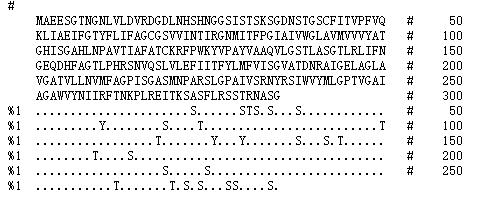
当然,只有图片也不行,毕竟还有一堆结果数据嘛,我们可以在以下区域统计磷酸化位点信息:
虽然可以用xpath定位和正则匹配的方式得到信息,但是写正则还是有点麻烦….直接把整个网页内容全选,保存为result.txt文件保存在本地,然后用以下代码统计磷酸化信息:
1 2 3 4 5 6 7 8 9 10 11 12 13 14 15 16 17 18 19 20 21 22 23 24 25 26 27 28 29 30 protein_dictionary = {} Serine = 0 Threonine = 0 Tyrosine = 0 with open ('result.txt' , 'r' ) as f: for line in f: if line.strip(): if line.startswith(">" ): gene = line.strip().split('\t' )[0 ] if line.startswith("%1" ): Serine += line.count("S" ) Threonine += line.count("T" ) Tyrosine += line.count("Y" ) else : if gene in protein_dictionary: continue else : protein_dictionary[gene] = [Serine, Threonine, Tyrosine] Serine = 0 Threonine = 0 Tyrosine = 0 with open ("classification.txt" , 'a' ) as out: for key, value in protein_dictionary.items(): total = sum (value) out.write(key[1 :] + '\t' + '\t' .join(map (str , value)) + '\t' + str (total) + '\n' )
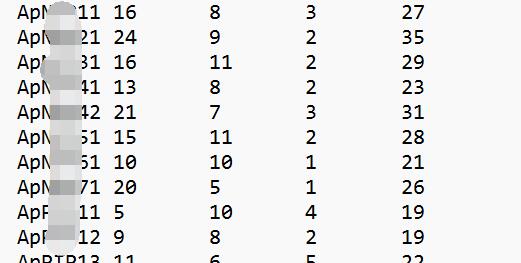
也是简单统计各个蛋白的磷酸化信息,结果文件classification.txt一共有5列,分别是蛋白名、丝氨酸磷酸化位点数、苏氨酸磷酸化位点数、酪氨酸磷酸化位点数和总的磷酸化位点数 。如下:
可以自己在最上方加上对应的信息。
4. Phyre2 这个网站是预测蛋白三维结构的,对于注册信息的用户,官方提供批量预测的通道(注册只要邮箱) 。
官网如下:PHYRE2 Protein Fold Recognition Server (ic.ac.uk)
再次提醒,批量预测一定要注册信息 !注册后点击左上角Expert Mode,选择Batch processing,如下:
不要跑了半天发现只预测了一条数据(说的就是我…….)。
单条序列的话结果文件会通过邮件附件直接发送给你,如果是batch processing,会提醒你到他们的网站查看结果。
下载上面的压缩包解压(里面是预测的最优3D模型数据),你会发现里面都是哈希值命名的文件,不过问题不大,有一个summaryinfo文件记录了蛋白名和哈希值之间的关系,先处理一下并且重命名pdb文件:
1 2 3 4 5 6 7 8 9 10 11 12 13 14 15 16 17 import osfilename = {} with open ('1293015811e6f396/summaryinfo' , 'r' ) as f: for line in f: if line.startswith("A" ): gene = line.split(' ' )[0 ] file = line.split(' ' )[2 ] filename[gene] = file for key, value in filename.items(): old_filename = f'1293015811e6f396/{value} .final.pdb' new_filename = f'1293015811e6f396/{key} .pdb' os.rename(old_filename, new_filename)
路径名用自己的就不解释了,pdb文件是记录蛋白三级结构的文件,我们一会儿还要用。
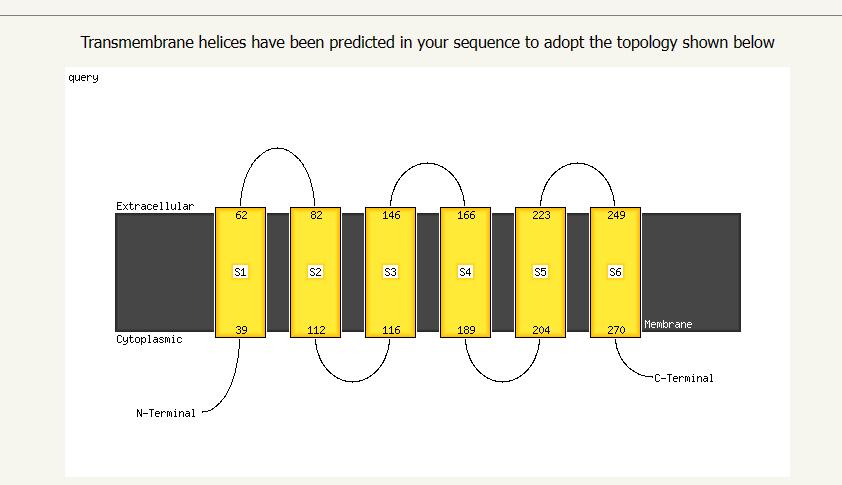
在上面的那个结果页面,我们可以点击Status栏的Finished,查看每条序列的预测详细结果,官网虽然也给出了3D模型预测图,但是像素比较低,而且黑乎乎的不好看,一会儿我们可以用PyMOL美化一下。这里拉到最底下还可以看到跨膜螺旋的预测结果:
这个图也可以用,按照前面爬图片的方法,也是F12呼出控制台,审查这个图片元素,你会发现这个图片的url也是有规律的,中间有一段哈希值就是summaryinfo文件中的哈希值,所以可以用下面脚本批量下载:
1 2 3 4 5 6 7 8 9 10 11 12 13 14 15 16 17 18 19 20 21 22 23 24 import requestsfilename = {} with open ('1293015811e6f396/summaryinfo' , 'r' ) as f: for line in f: if line.startswith("A" ): gene = line.split(' ' )[0 ] file = line.split(' ' )[2 ] filename[gene] = file for key, value in filename.items(): image_url = f'http://www.sbg.bio.ic.ac.uk/phyre2/phyre2_output/{value} /query_cartoon_memsat_svm.png' file_name = f'{key} .png' response = requests.get(image_url) if response.status_code == 200 : with open (file_name, "wb" ) as file: file.write(response.content) print (f'图片{file_name} 保存成功!' ) else : print (f'无法下载图片:\n{image_url} ' )
5. PyMOL 这是一个开源的分子三维结构显示软件,不过后来商业化了….好消息是咱们学生可以申请教育版认证,也是留下邮箱即可,认证的过程就不说了。最后我们得到一个认证证书,在第一次启动软件的时候会提醒我们认证。
这个不是在线工具,想了想还是顺便放上来了,主要用来给Phyre2预测的3D模型批量调整的。
使用方法不介绍了,网上教程一大堆,就接着上面的步骤。这个工具的优点在于可以用命令行跑,兼容python(人家本来就是python写的),写一个批量处理的脚本:
1 2 3 4 5 6 7 8 9 10 11 12 13 14 15 16 17 18 19 20 21 from pymol import cmdfilename = [] with open ('1293015811e6f396/summaryinfo' , 'r' ) as f: for line in f: if line.startswith("A" ): file = line.split(' ' )[0 ] filename.append(file) for i in filename: file_path = f'1293015811e6f396/{i} .pdb' cmd.load(file_path) cmd.bg_color('white' ) cmd.spectrum(expression="count" , palette="rainbow" ) cmd.ray(2000 ,2000 ) new_path = f'3D_models/Models/{i} .png' cmd.save(new_path) cmd.delete('all' )
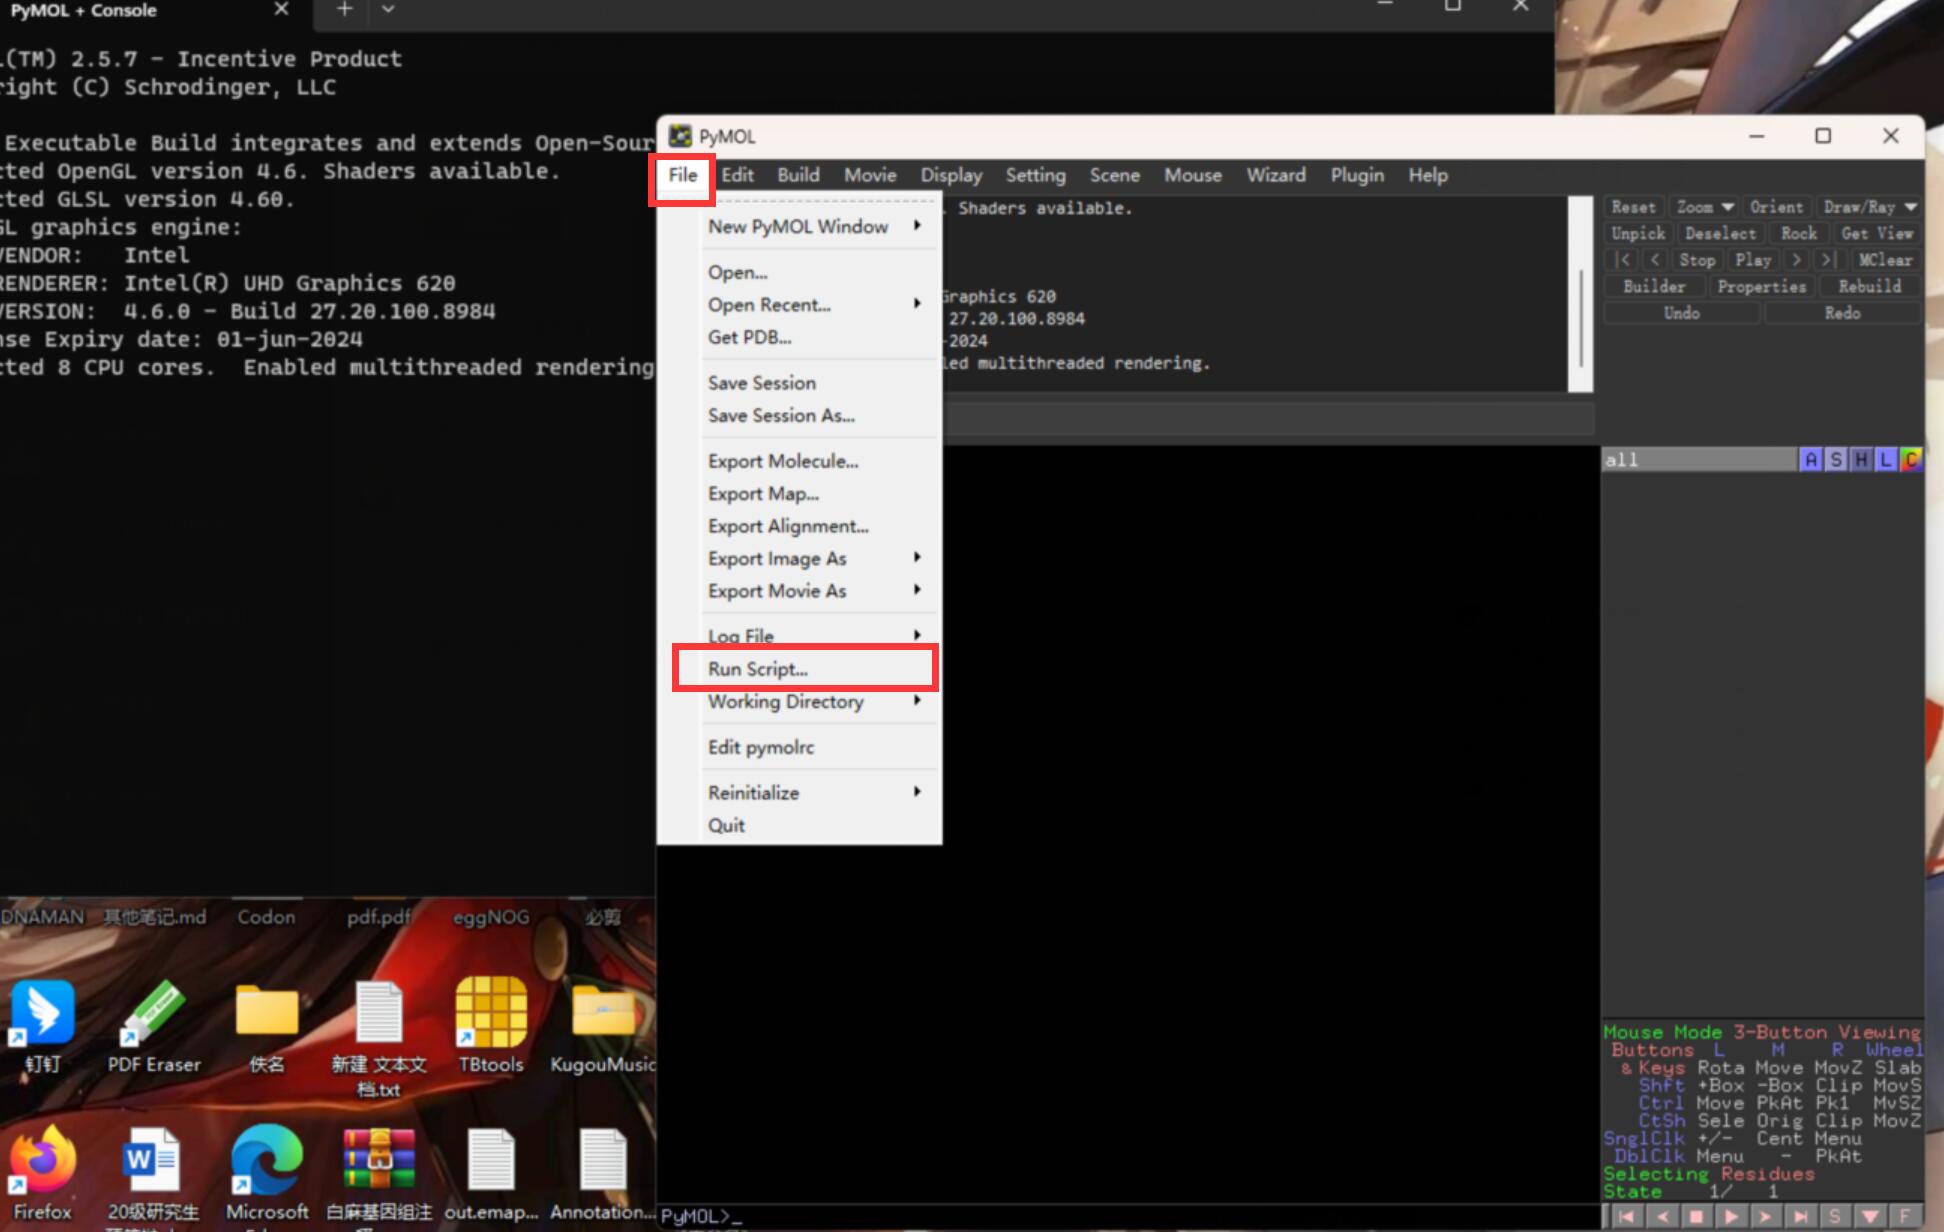
打开软件,点击File——Run Script,运行上面的python脚本:
就可以静静等待出图啦~
我这里就是简单把黑乎乎的背景改成了白色,如果想提高渲染质量,可以把cmd.ray()函数的参数再调高,以及其他个性化的处理。可以根据自己的需求,查看PyMOL的命令行手册:PyMOL Command Reference
2024/4/20 更新 如果觉得selenium运行的时候浏览器太碍事,可以无头浏览器模式挂在后台运行。需要注意优化页面交互 ,如果频繁进行页面刷新和跳转,无头浏览器运行可能会抛出异常”StaleElementReferenceException” 。
这个异常是由于网页元素在你尝试与之交互的时候已经发生了变化,导致 Selenium 无法再找到该元素。可以通过调整等待时间,等待元素稳定后再进行交互,用WebDriverWait 显式等待来确保元素已经完全加载和可交互。
1
2
3
4
5
from selenium.webdriver.support import expected_conditions as ECsearch_input = WebDriverWait(bro,5 ).until(EC.presence_of_element_located((By.NAME, 'S1' ))) btn = WebDriverWait(bro, 10 ).until(EC.element_to_be_clickable((By.XPATH, '//*[@type="submit"]' )))
WebDriverWait(bro, 5):这里创建了一个 WebDriverWait 对象,传入了 WebDriver 对象 bro 和等待的最大时长 5 秒。这意味着程序将等待最多5秒,直到条件满足或超时。until(EC.presence_of_element_located((By.NAME, 'S1'))):这是 WebDriverWait 的方法,它接受一个条件作为参数,直到该条件成立或超时才会继续执行。在这里,使用 EC.presence_of_element_located 来指定条件,即等待直到页面上具有指定名称(’S1’)的元素出现在DOM结构中。使用 EC.element_to_be_clickable 来指定条件,即等待直到页面上具有指定 XPath 的元素可被点击。
这样可以确保元素已经加载并可见,避免了在元素未出现时导致的 “StaleElementReferenceException” 异常。